
Oftentimes when I show my husband a photo that I've edited in Photoshop, he asks what it looked like before editing. Hence, this page dedicated to some "before and afters." I need to do a better job of documenting my editing, so bear with me. Click on the photo to view it larger. Comments are appreciated!


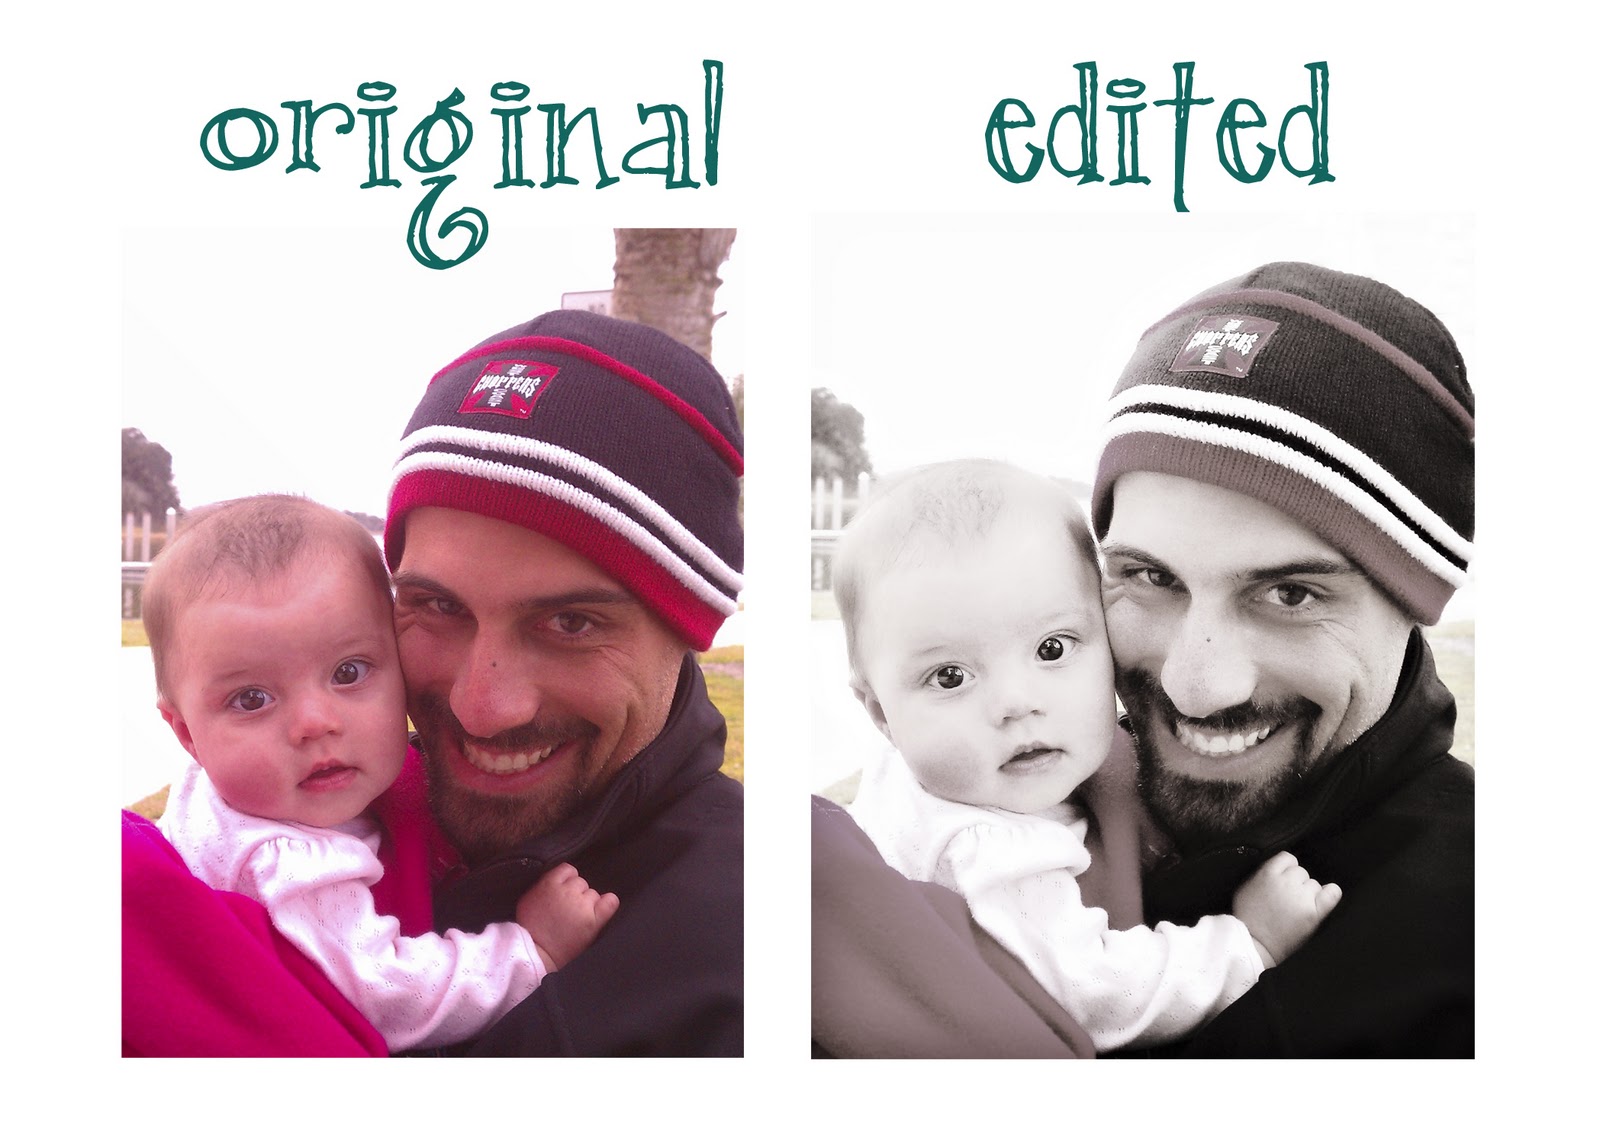
 {This photo was taken with a mobile device, so the quality and coloring were not the greatest. I tried to fix the coloring using a "cooling" filter as well as soften the photo to remove pixelation. I could not get the color to my liking, so I chose to desaturate the picture and use the clone stamp to remove some distracting background. I love the way Julee's eyes turned out...and I didn't even edit them!}

{Without a doubt, I almost ALWAYS use Kubota's 'Daily Multivitamin' action as well as Totally Rad's 'Boutwell Magic Glasses.' I have also become a huge fun of "lightening" the focal point and darkening the edges. In the OnOne PhotoTools plug-in, there is a specific action called 'Darken and Lighten' under the Portrait category. This is only good, however, if the focal point is in the center, as it was in the photo above. If the focal point is other than the center, you can use a lightening action, such as Totally Rad's 'Lights On' and then use a vignette to darken the outer edges.}

{With the two beach photos - one above and one below - I used my trustee 'Daily Multivitamin' and 'Boutwell Magic Glasses' actions. I also experimented with some of Totally Rad's textures, and applied Johnny Thunderpants at 80%. I had never used the textures before, but thought they gave the photo appear to be more of a painting. I had the photo above printed on a gallery wrapped canvas and it turned out beautifully.}


